Architecture
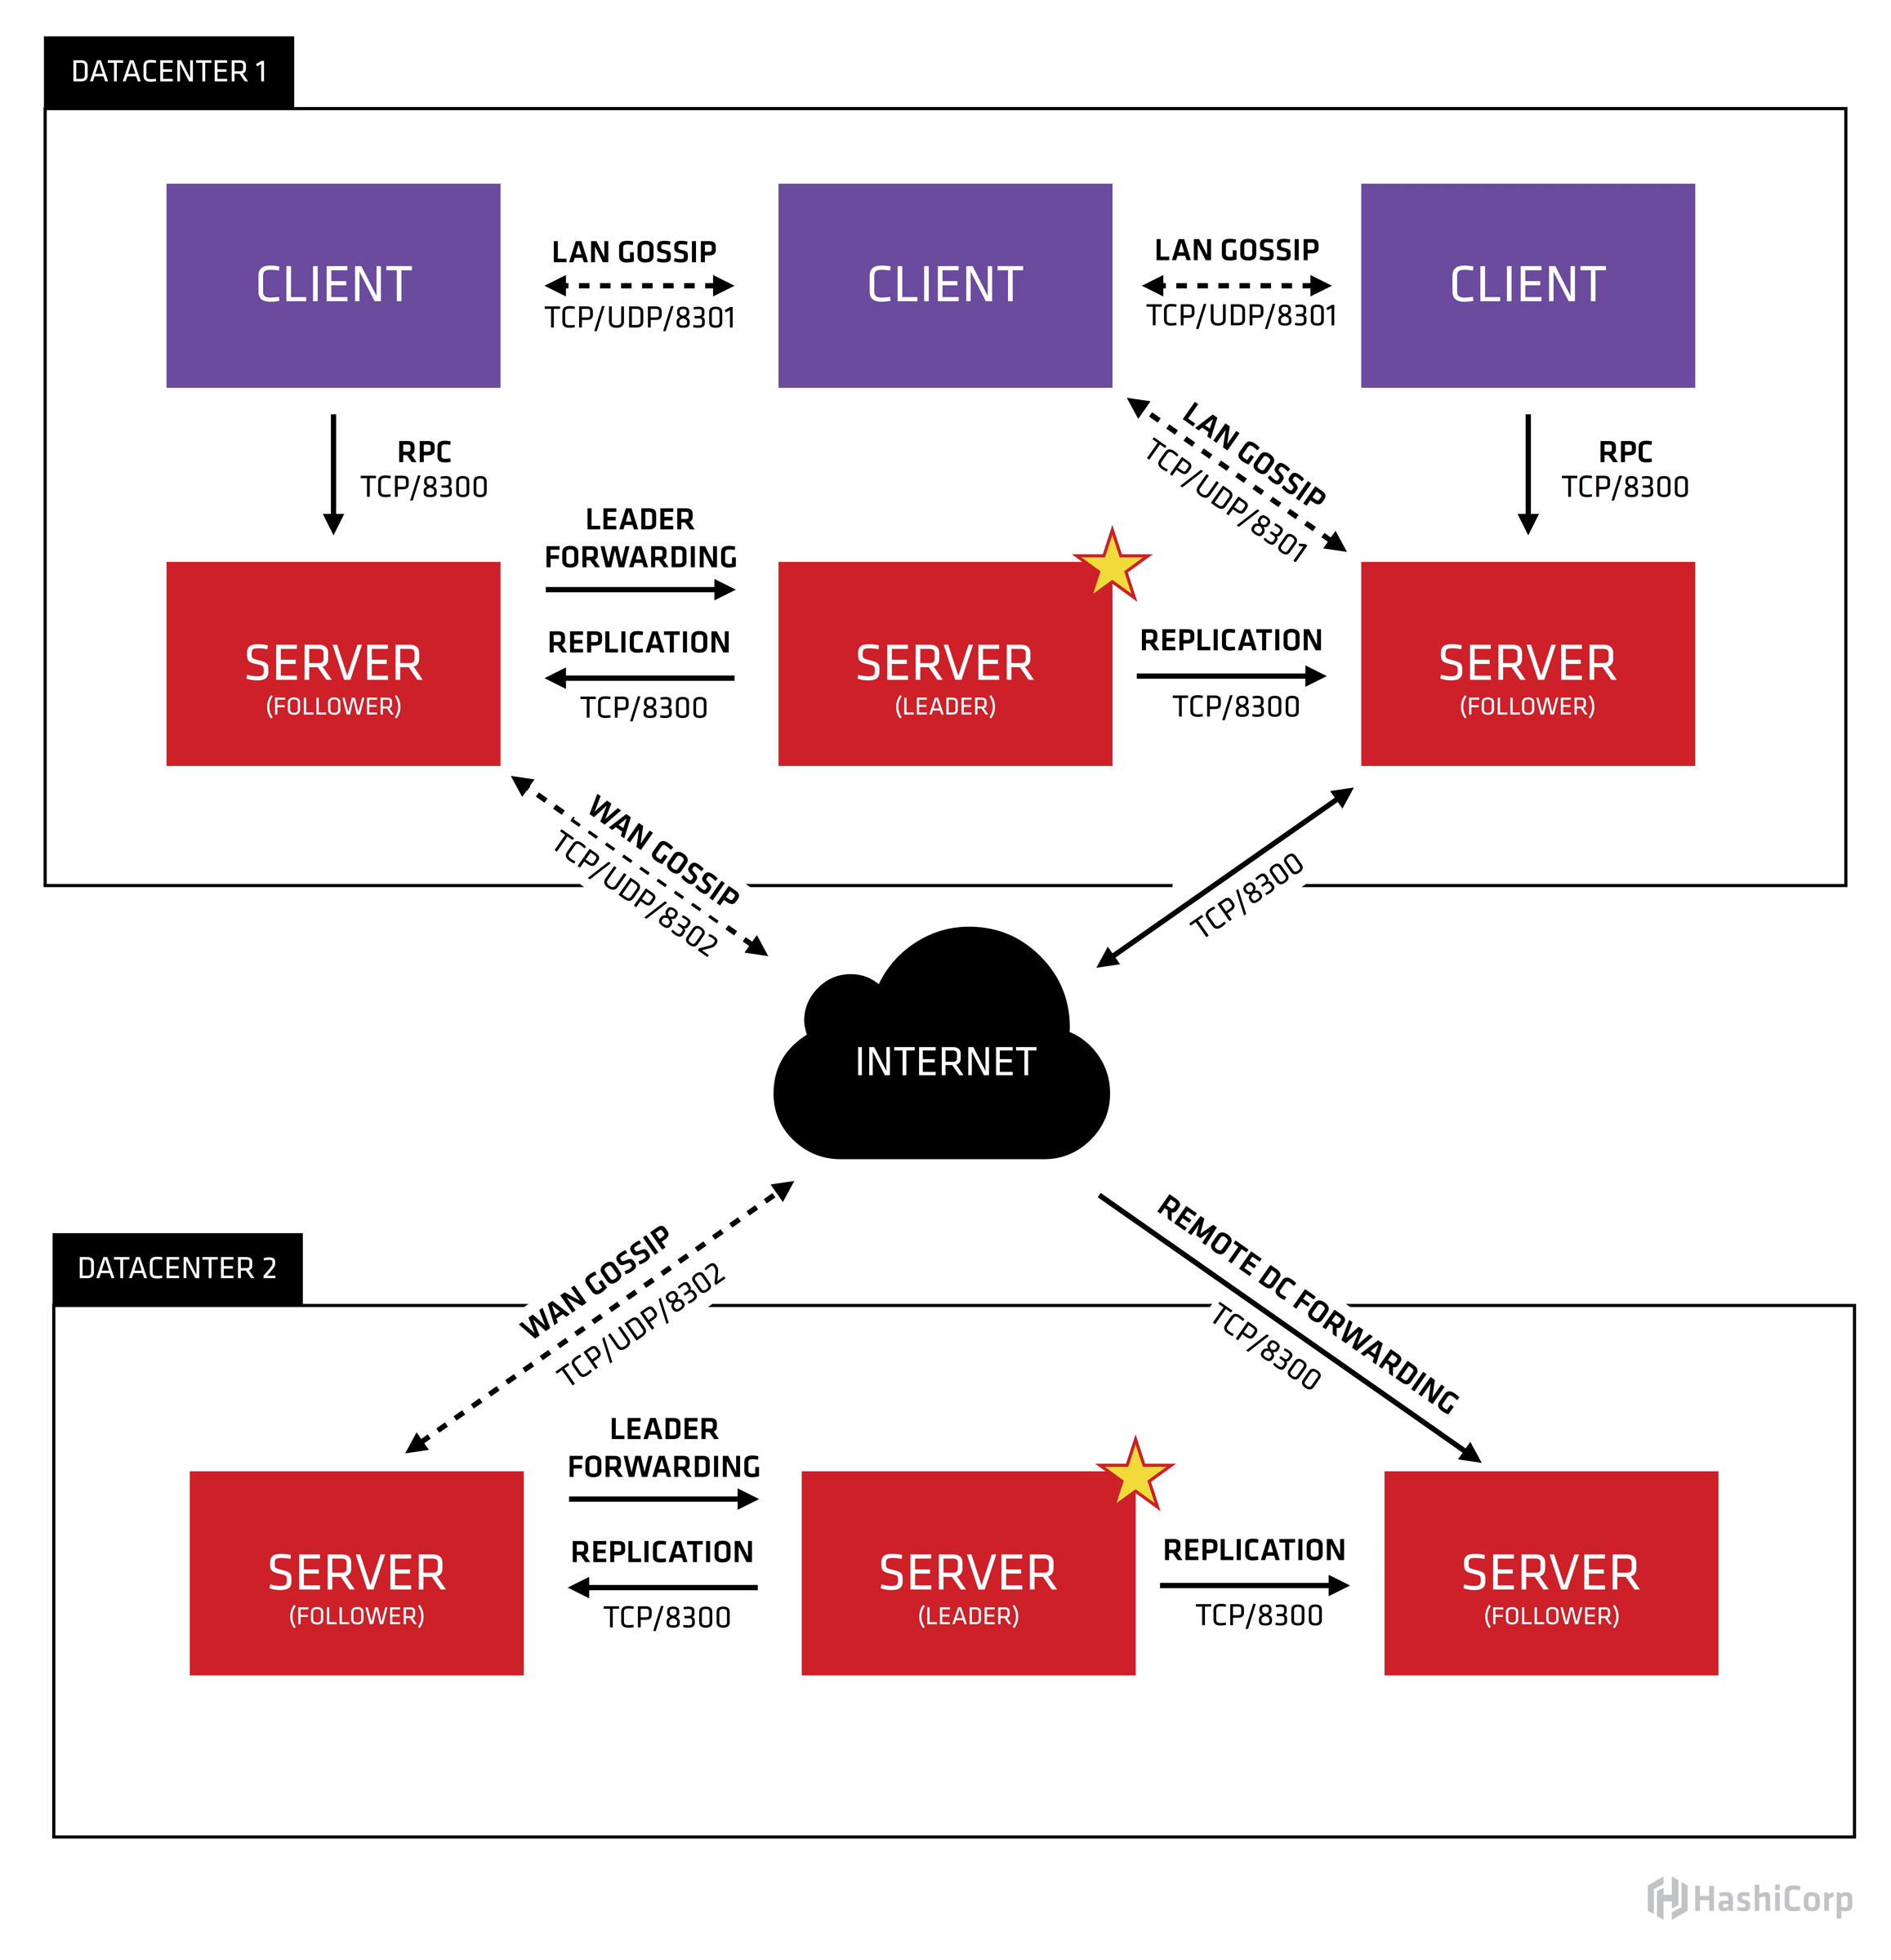
RPC:Remote Procedure Call,這是 client & server 之間進行 request/response 的機制Agent:agent 是一個長時間運行在 Consul cluster 中的一個 daemon,可以 server or client 兩種模式運行,每個 agent 都可以運行 DNS & HTTP interface,並負責檢查確保 cluster 的 service 的一致性Client:負責將所有的 RPC 轉到 server 去,並在背景中一部份參與 LAN gossip pool,工作量不大,因此消耗的資源 & 網路頻寬就很少Server:同樣也是 agent,但是要負責的工作就多很多,包含參與 Raft quorum,維護 cluster 狀態,回應 RPC query,與其他 datacenter 進行 WAN gossip,將 query 轉發給 leader 或是其他 datacenterDatacenter:具有獨立網路、低延遲、高頻寬的一個 infra 環境,官網定義中,把 AWS 中同一個 region 但在不同 AZ 的 環境都當作是一個 datacenterConsensus:(待補…)Gossip:(待補…)LAN Gossip:(待補…)WAN Gossip:(待補…)
詳細的原理說明,可以參考此篇文章(Consul原理解析 | ljchen’s Notes),寫的相當清楚。
Installing Consule
這部份沒太特別,可直接下載官網的 binary,解壓縮後放進 /usr/bin 即可。
Run the Consul Agent
這部份大概有以下幾個重點:
要使用 Consul,首先要先運行一個 agent 起來才行,而 agent 的運行可以分為 server mode & client mode
一般為了 HA 的目的,在 data center 中可以設置 3 or 5 個 server mode agent,若是要開發測試用,一個 server mode agent 即可
除了 server mode agent 之外,其他的 agent 都是以 client mode 運行,而 client 是個非常輕量的 process,負責作 service registration, health check, forward query to server 等工作,而 cluster 中的每一個 node 都必須運行一個 consul client
Start the Agent
以下透過 docker-compose,啟動一個開發模式的 agent:
1 | version: '3' |
啟動之後就可以來查詢一下 member status:
1 | $ consul members |
上面的資訊是由 Gossip protocol 所提供,因此在特定時間點上,不同的 local agent 可能看到的內容會稍微有差異(但最後會一致),若是要查詢最正確的 cluster 資訊,則是要透過 HTTP API call,由 Consul servers 來回答:
1 | # 透過 HTTP API 查詢 |
Registering Services
由於 Consul 是個可以用來協助進行 service discovery 的工具,因此如何向 consul 註冊 & 查詢 service 是很重要的!
Definining a Service
重新調整一下 docker-compose 設定,並設定可自動載入外部的設定檔:
1 | version: '3' |
接著在 config-dir 中放入以下幾個 json 檔案:
1 | {"service": {"name": "web", "tags": ["rails"], "port": 80}} |
1 | {"service":{"id":"server-1","name":"server","tags":["server-1","S5B","rack5","u-13"],"address":"10.5.92.11","port":443}} |
1 | {"service":{"id":"server-2","name":"server","tags":["server-2","S5B","rack5","u-15"],"address":"10.5.92.12","port":443}} |
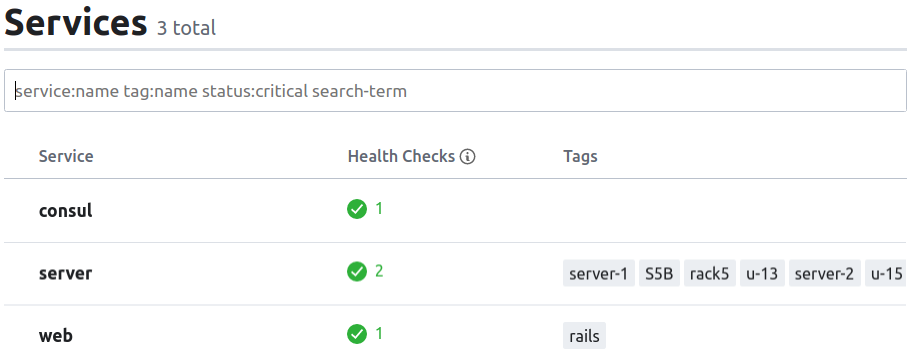
啟動 container 後,consul 會從指定的 config-dir 自動載入 service 相關的檔案,可以在 UI 上看到 service 列表:
Querying Services
看到 service 出現後,可以怎麼使用呢?
先撇開這問題不談,先說 consul 本身除了提供 HTTP API 的查詢外,也可以透過 DNS 查詢:
1 | # 使用 name 作為 domain prefix 查詢 |
從上面可以看出,使用者可以將其他服務的 DNS 指向 consul,並透過 name, id, tag,向 consul 詢問到正確的 service list,因此系統架構中的其他 service 就不用再考慮 ip address 這個層面的問題了!
當然也可以透過 HTTP API 查詢:
1 | $ curl http://localhost:8500/v1/catalog/service/server |
Updating Services
理解上面的查詢方式後,那如何更新呢? 有兩種方式:
修改原本的 configuration file,並送一個 SIGHUP 訊號給 consul agent,就會自己 reload 並套用了
透過 HTTP API 修改
而關於 service,有哪些屬性可以拿來設定呢? 可參考 Consul 官網的 API 文件 得到答案。
Registering Health Checks
要實作 service discovery 的功能,有一個很重要的部份就是 health check;為了避免 client 連線到無法提供正常服務的 service,做好 service health check 這件事情就是必須的。
Defining Checks
首先,為了啟動 service health check 的功能,啟動 Consule agent 時必須將 enable_script_checks 設定為 true;另外,要增加 check 的設定,可以在 json 設定檔中定義,也可以使用 HTTP API call 來達成。
若要了解 check 的詳細設定,可以參考官網文件,以下用幾個範例簡介:
ping.json
1 | {"check": {"name": "ping", "args": ["ping", "-c1", "google.com"], "interval": "30s"}} |
server-1.json
1 | {"service":{"id":"server-1","name":"server","tags":["server-1","S5B","rack5","u-13"],"address":"10.5.92.11","port":443,"check":{"id":"api","name":"HTTPs IPMI portal check","http":"https://10.5.92.11","tls_skip_verify":true,"method":"GET","header":{"x-foo":["bar","baz"]},"interval":"10s","timeout":"5s"}}} |
server-2.json
1 | {"service":{"id":"server-2","name":"server","tags":["server-2","S5B","rack5","u-15"],"address":"10.5.92.12","port":443,"check":{"args":["curl","10.5.92.12"],"interval":"10s"}}} |
當 consul 取得以上設定後,可以從 UI 畫面中看到以下內容:
Health Check Overview: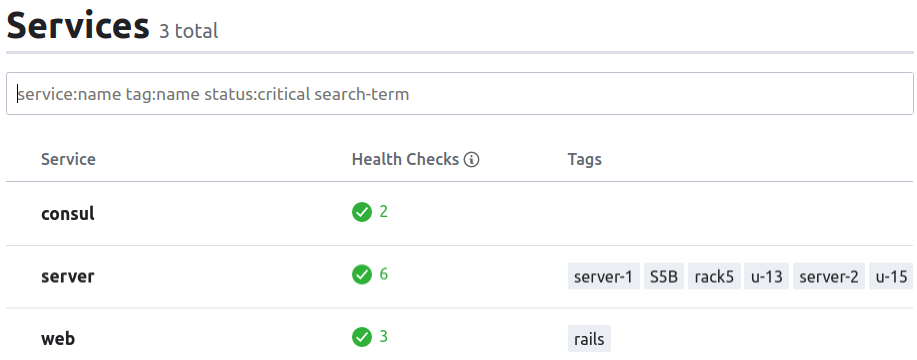
Service Health Check Overview: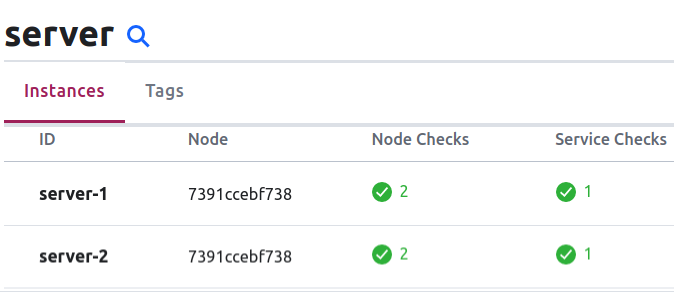
Service Level Health Check Status: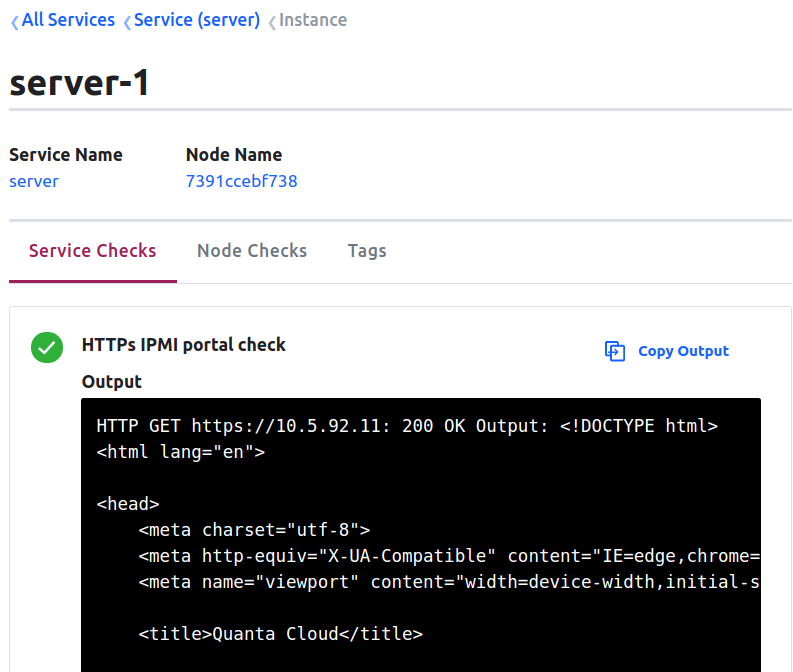
Node Level Health Check Status: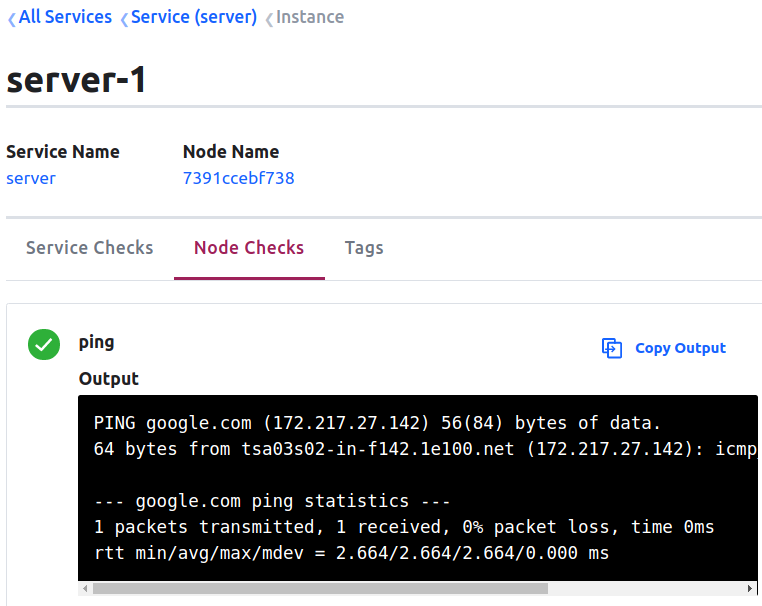
Checking Health Status
當加入 Health Check 的機制後,若是某個 service 的狀態不健康了,透過上面提到的 service 查詢,就不會回應該 service 的資訊,也就是說:
Consul 只會回應使用者目前健康狀態檢查通過的 service 列表
這是在 service discovery 這個主題中非常重要的功能,此外,若是透過 CLI 可以用 curl http://localhost:8500/v1/health/state/critical 來查詢有問題的 service。